Installation
System requirements
Microsoft Windows Operating System (10 or later)
QGIS 3.34.3+
Introduction
New versions of FEWS tools plugin are released periodically as bugs are discovered and repaired, or when performance improvements are implemented. This section describes the process of downloading and installing the FEWS tools plugin for QGIS for:
New users
Current users of FEWS tools plugin
https://www.youtube.com/watch?v=dQc8cKEjAek
A.1.1. Download FEWS tools plugin (all users)
Please download the latest version of the plugin from:
https://edcintl.cr.usgs.gov/downloads/sciweb1/shared/fews/geoclim/QGIS3/fews_tools_v3_2_0.zip
A.1.2. Install the FEWS tools plugin (new and current users)
A.1.2.1. New users
Open QGIS.
Go to plugins pull-down menu.
Select Manage and Install Plugins.
Select Install from Zip, see Figure A.1.
Browse and select the fews_tools.zip file that you just downloaded.
Click on Install Plugin and follow the instructions, see Figure A.1.
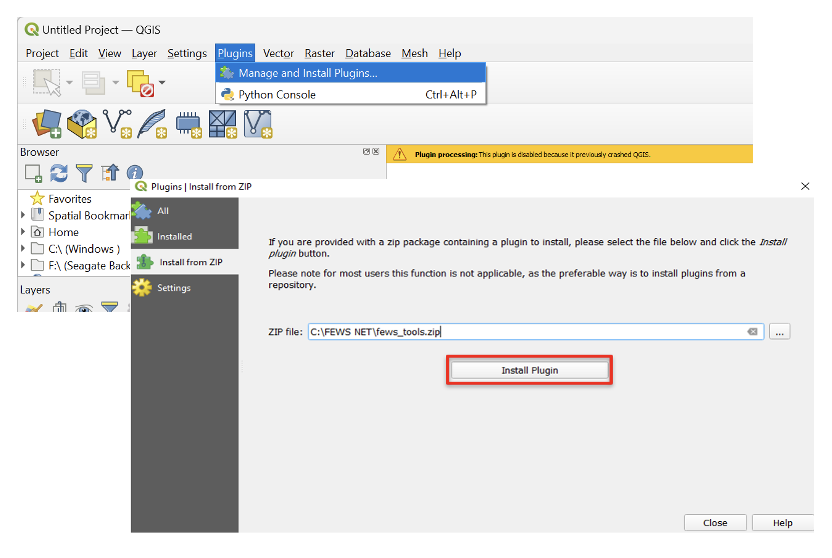
Figure A.1 Install the plugin from the zip file.
Click Yes to accept all warnings and prompts that follow. See Figure A.2.
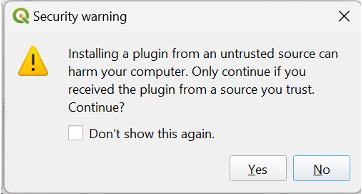
Figure A.2 Confirm the creation of the workspace fews_tools_WS.
In QGIS, navigate to the Plugins menu and ensure there's a checkmark next to FEWS Tools to activate the plugin. See Figure A.3.
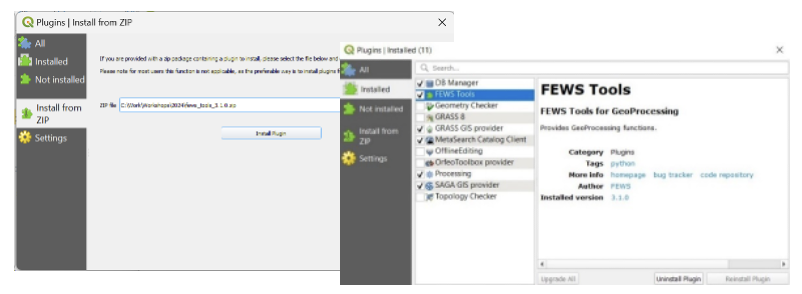
Figure A.3 Checkmarks indicate which plugins have been turned on.
In some cases, it is necessary to restart QGIS. Once the plugin is installed, the FEWS Tools pull-down menu appears on the QGIS main bar, see Figure A.4.

Figure A.4 Once the plugin is installed the new pulldown menu FEWS Tools appears on the main toolbar in QGIS.
Click on the FEWS Tools menu.
Select GeoCLIM/GeoCLIM Tools or GeoWRSI to activate the tool bars.

Figure A.5 Select the GeoCLIM Tools to see the available functions.
At this point the tool is ready to use. Continue on to FEWS Tools Settings.
1.2.1.1. How to move the workspace
Click Workplace Setting (yellow folder icon as seen in Figure A.5).
Browse to select a folder for the new workspace location.
Click Ok and click Yes to confirm.
1.1.2. Current users: Installing a new version of the plugin
If you are already using the plugin and are installing an update, please keep in mind that all the datasets and region definitions that you have created are saved on the database file fewstools.sqlite, in the fews_tools directory in C:\Users\[name]\AppData\Roaming\QGIS\QGIS3\profiles\default\python\plugins\fews_tools (see Figure A.6).
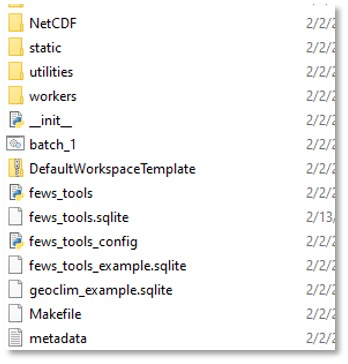
Figure A.6 Backup the fewstools.sqlite file to keep all your settings.
NOTE: Make sure to backup frequently the database file fewstools.sqlite which contains all the changes in settings that you have made to customize the plugin, including the datasets, regions, path to new workspace, etc.
To install the new version, follow the steps below:
Save the
fewstools.sqlitefile in a separate directory.Uninstall the plugin, see Figure A.7.
Go to QGIS/plugins/installed.
Select FEWS Tools.
Click on Uninstall Plugin.
Install the new version of the plugin as described in A.1.2.
Replace the default fewstools.sqlite file in
C:\Users\[name]\AppData\Roaming\QGIS\QGIS3\profiles\default\python\plugins\fews_toolswith the one saved from the previous version.Restart QGIS.
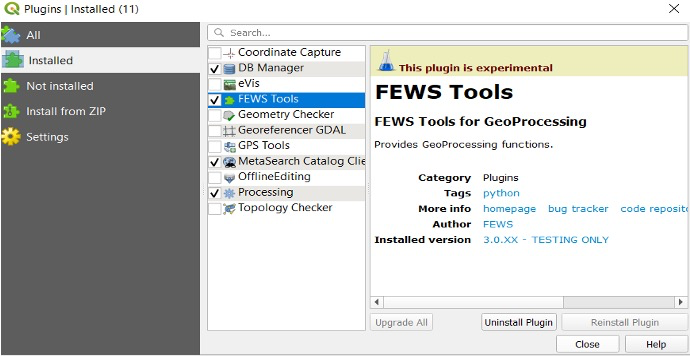
Figure A.7 Uninstall all previous versions of the plugin before installing a new one.
NOTE: If you had already moved the workspace from the default to a new directory, before installing the new version, the path is corrected by replacing the fewstools.sqlite file.